Creating a Azure Cloud Service allows you to register a subdomain of cloudapp.net and assigns a Virtual IP address (VIP) to the cloud service.
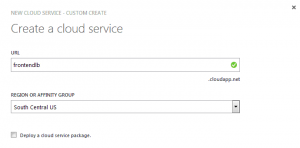
In this example we use “frondendlb” for our load balancing DNS name.
This would create the DNS name “frontendlb.cloudapp.net” over the internet.
This blog post will cover how to create an Azure Cloud Service in Classic deployment model.
This post can be used together with:
Steps for creating an Azure Cloud Service
The steps to create this will be as follows.
Create new Azure Cloud Service
Select new, Compute, Cloud Service Custom Create
Enter unique URL for the Cloud Service, Select Region
Once deployed, the cloud service appears under Cloud Services
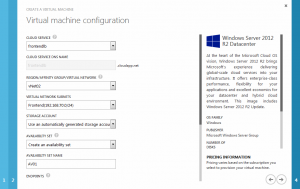
This can be used for example, when creating Virtual Machines. See Cloud Service “frontendlb” selected from the drop down below.
Any requests to DNS address frontendlb.cloudapp.net will get directed to the Virtual Machine endpoint or load balanced network.
This was explained in article Creating Azure External Load Balancer in Classic.


