
Boomerang from Unitrends is an excellent tool for cloud migration or replicating VMware Virtual Machines into the cloud – It can perform VMware to AWS or VMware to Azure Virtual Machine cloud migration using a very simple dashboard and VM appliance.
Boomerang can also be used to replicate a VMware environment to a Disaster Recovery site to run VMs as an alternative from an on premise site or datacentre, it can perform VMware to Amazon AWS or VMware to Microsoft Azure Disaster Recovery.
Move or cloud migration, VMware to AWS or VMware to Azure is a very simple process which is outlined in this step by step article in moving and migrating to the cloud below. This can be all part of you journey to the cloud, taking a step by step approach.
Using the cloud is the cheaper option, as all you pay for is cloud storage and compute, not the underlying infrastructure and the time it takes to deploy or provision this infrastructure for your Disaster Recovery site.
The cost of provisioning another datacentre for DR is costly, building together with routers, switches, cabling, hardware, licensing for hypervisors etc is expensive. The list goes on.

This is all extra cost for something you may never actually use to its full potential unless a disaster is actually provoked, and even then it normally only runs for a period of time until migration back to the original on premise datacentre is performed.
Using the cloud, resources are billed on-demand, depending on the cloud platform – Amazon AWS bills Compute per hour. Storage costs are billed per GB used.
However the Virtual Machines don`t have to be running all the time and being billed for Compute. The way this works is Virtual Machines are replicated (this can be scheduled or run automatically) from the customers on premise (original datacentre) to inexpensive AWS S3 storage. When a Disaster Recovery is triggered and initiated or migration is planned, S3 replicated data is converted to AMIs and cloud foundry is used to spin up EC2 instances in the cloud either using the original IP address or different IP.
This can all be achieved performing easy replication, disaster recovery setup, optimization for VM recovery or migration within hours using a simple web interface to migrate cloud.
Restore or copyback can be used when the time is ready to failback to the original datacentre.
Prerequisites for Boomerang cloud migration at the time of writing this article is as follows:
Boomerang is run as a Virtual Appliance in OVA format.
Boomerang works with VMware ESXi only to migrate Virtual Machines.
Minimum VMware requirements for Boomerang are:
- ESX 5.x and above using paid or licensed (not ESXi Free version)
- 2 vCPUs assigned to the VM
- 6GB RAM assigned to the VM
- 16GB Hard Drive (Thin provisioned)
- VMXNET 3 Virtual Network Adaptor
Compatible browsers to use Boomerang appliance interface.
- Internet Explorer 10+
- Microsoft Edge
- Firefox 33+
- Chrome 39+
- Safari 7.1+
Steps for configuration and cloud migration of VMware Virtual Machines to AWS
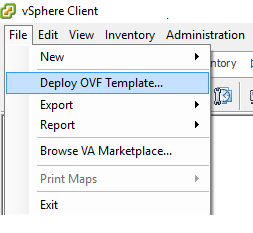
Deploy the OVA into VMware vSphere Client, click next and deploy the Virtual Machine into your environment.
Confirm VM is 100% deployed
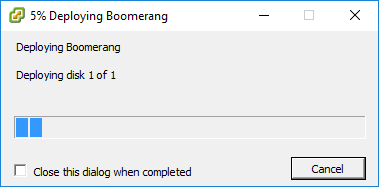
Power up the Boomerang Virtual Machine

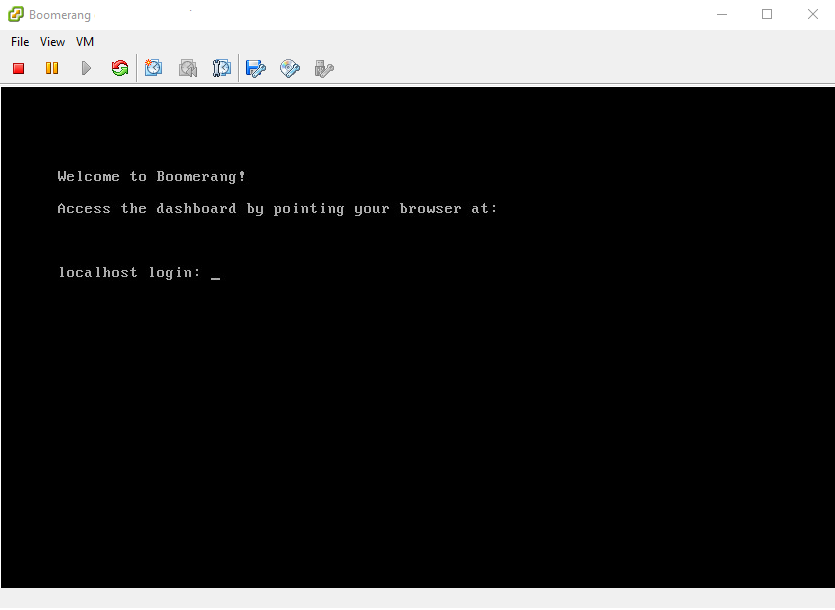
Browse to IP using the Web Browser https://192.168.255.1
The Boomerang appliance provides a management IP address listening on 192.168.255.1.
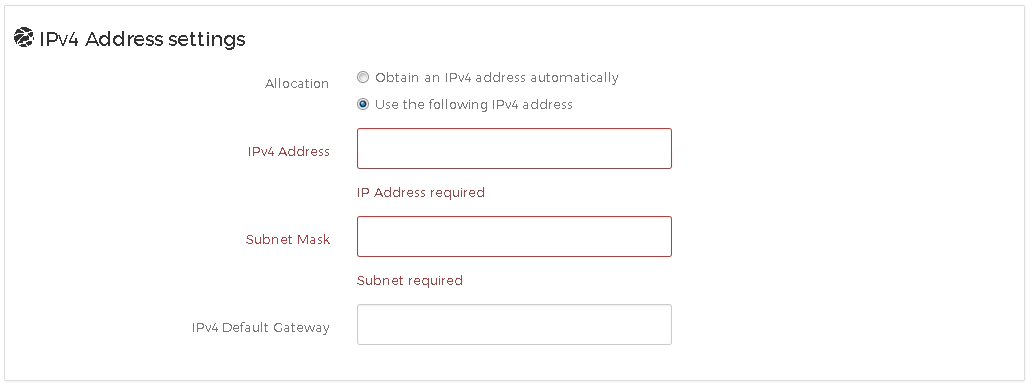
To access this configure an IP address on the same subnet on another VM in the same network environment.
If you don’t have DHCP enabled on your network, a static IP will need to be configured on the device via ‘settings’.
![]()
Add in the IP address / Gateway / Subnet and DNS etc
If you don’t enter a license email and key, then the appliance will allow a Boomerang free month trial.
Configure Regional Settings
Configure Admin password

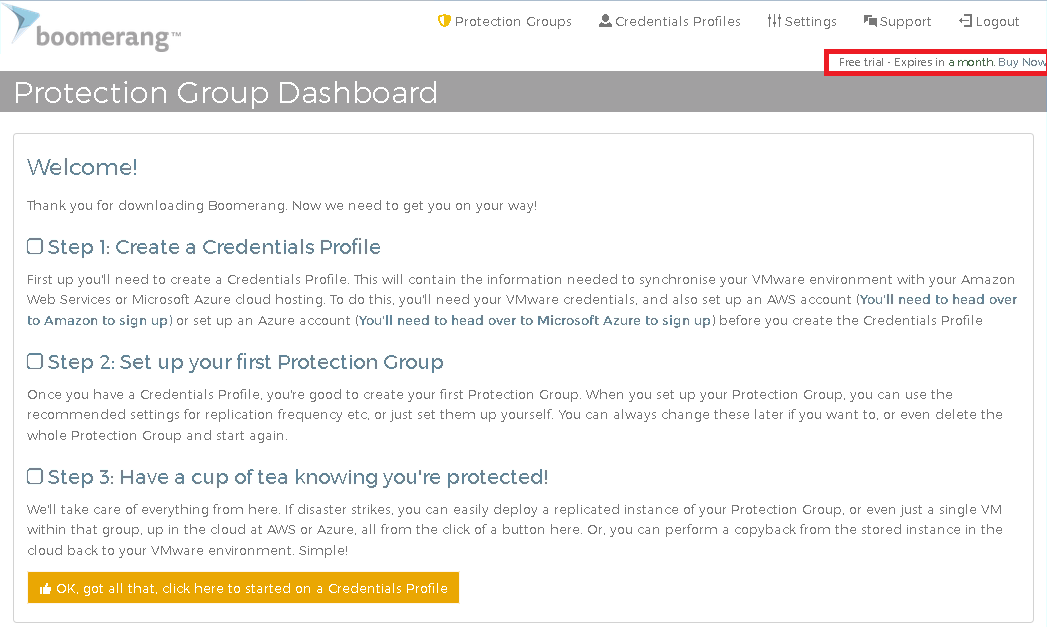
Free trial will be highlighted in the top right hand corner.
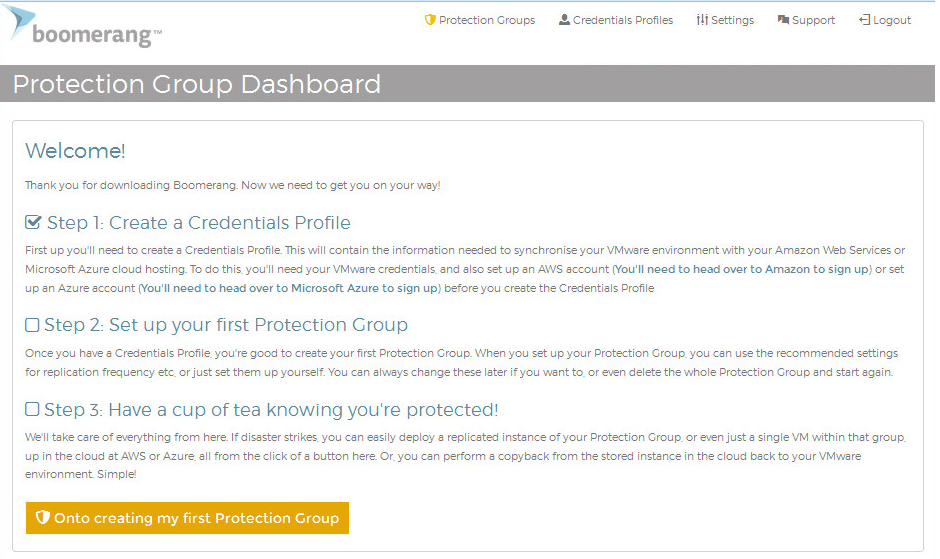
Click Step 1: Create a Credentials Profile
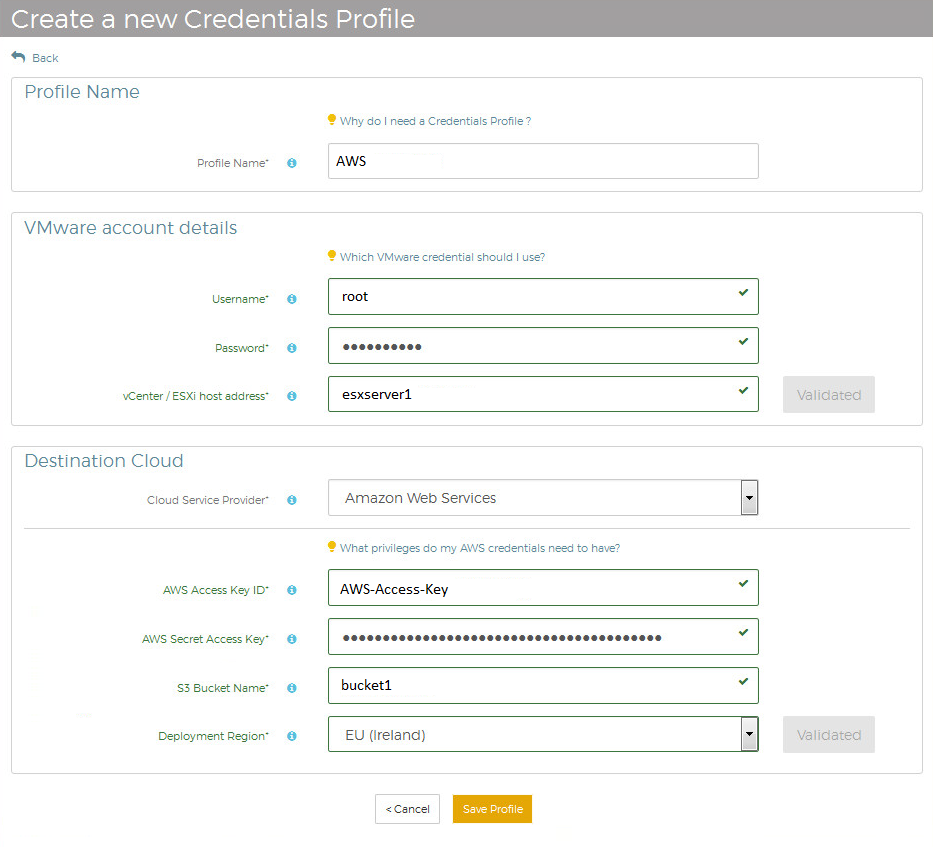
Create a new Credentials Provider
Enter VMware account details connecting to your ESXi host or vCenter Environment.
Select Destination Cloud, either VMware to AWS or VMware to Azure.
In this case we are configuring AWS so require a AWS Access Key ID & Key together with bucket name and required deployment region.
The minimum AWS privileges required to run boomerang is as follows:
- Full access to AWS EC2 services
- Full access to AWS S3 services
- Full access to AWS Cloud Formation services
- Access to number of IAM service APIs
Using that account, can then populate the following fields in Boomerang portal:
- AWS Access Key ID
- AWS Secret Access Key
- S3 Bucket Name
- Deployment region
To create an AWS Access Key follow this AWS guide http://docs.aws.amazon.com/AWSSimpleQueueService/latest/SQSGettingStartedGuide/AWSCredentials.html
To create an AWS Bucket in AWS follow this guide http://docs.aws.amazon.com/AmazonS3/latest/gsg/CreatingABucket.html
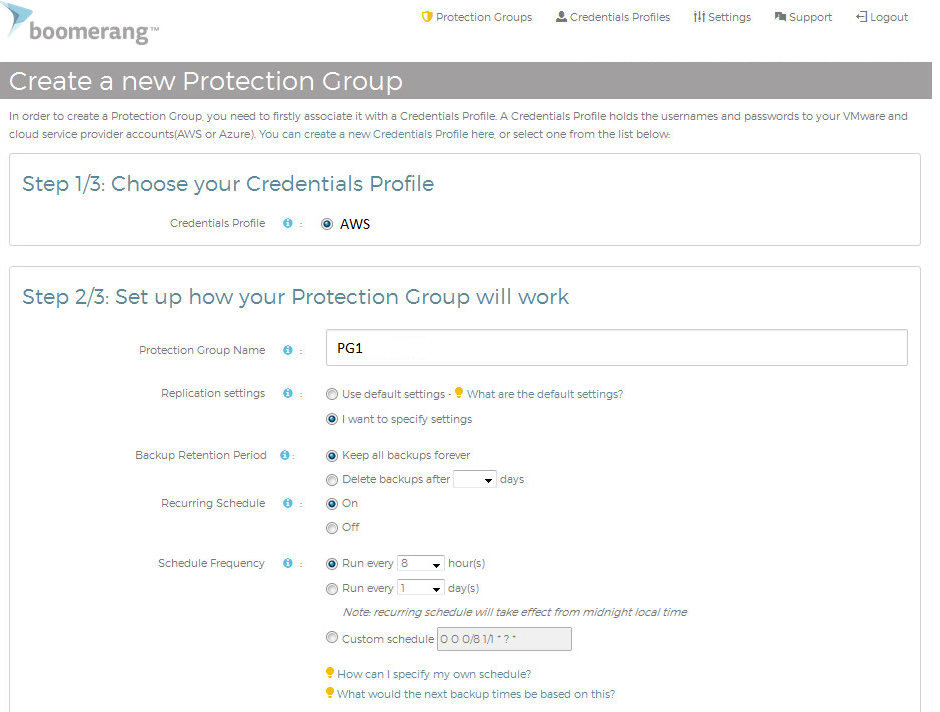
Enter Protection Group Name
Replication settings can either be left as default

Or choose replication settings as follows for cloud migration
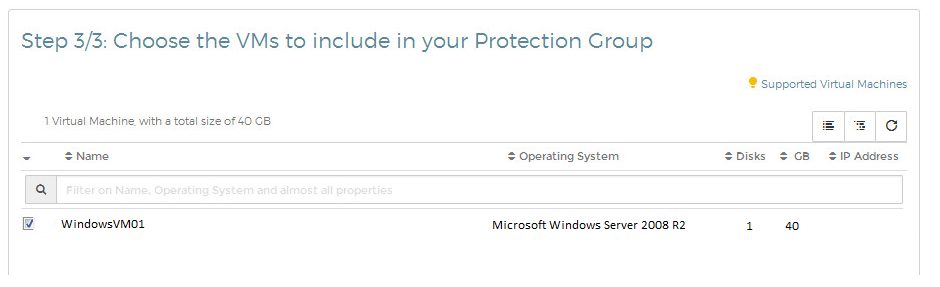
Then choose the Virtual Machines listed from VMware to replicate from VMware to AWS, in this case we will replicate a single VM called “WindowsVM01” to AWS.
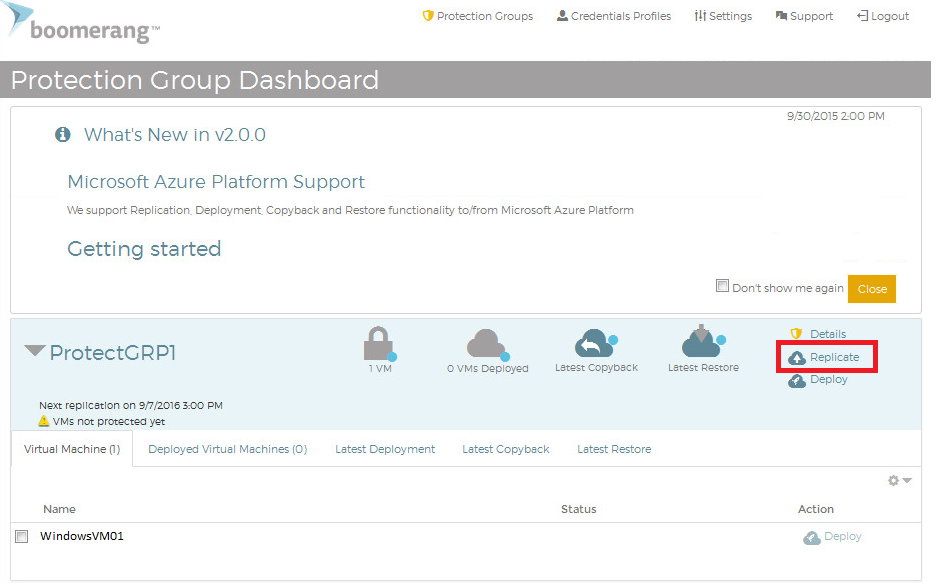
Click Replicate for cloud migration
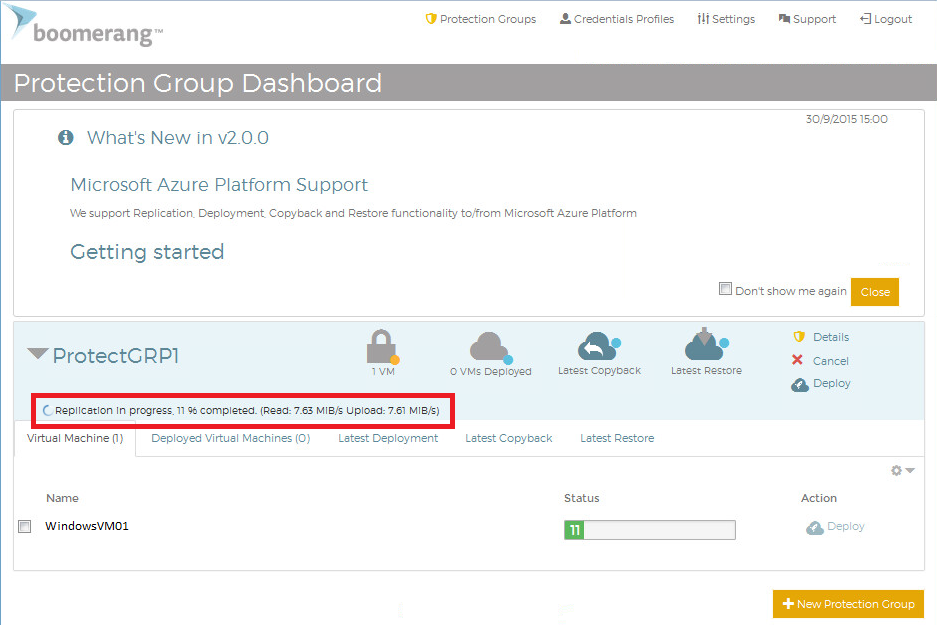
Progress will be shown below from migration from VMware to AWS
Goto VMware vSphere client right click Virtual Machine eing migrated (WindowsVM01) and click Snapshot Manager
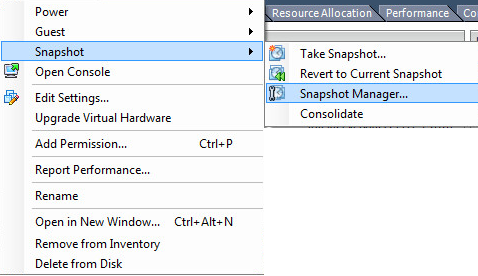
Boomerang will create a snapshot during replication of the Virtual Machine.

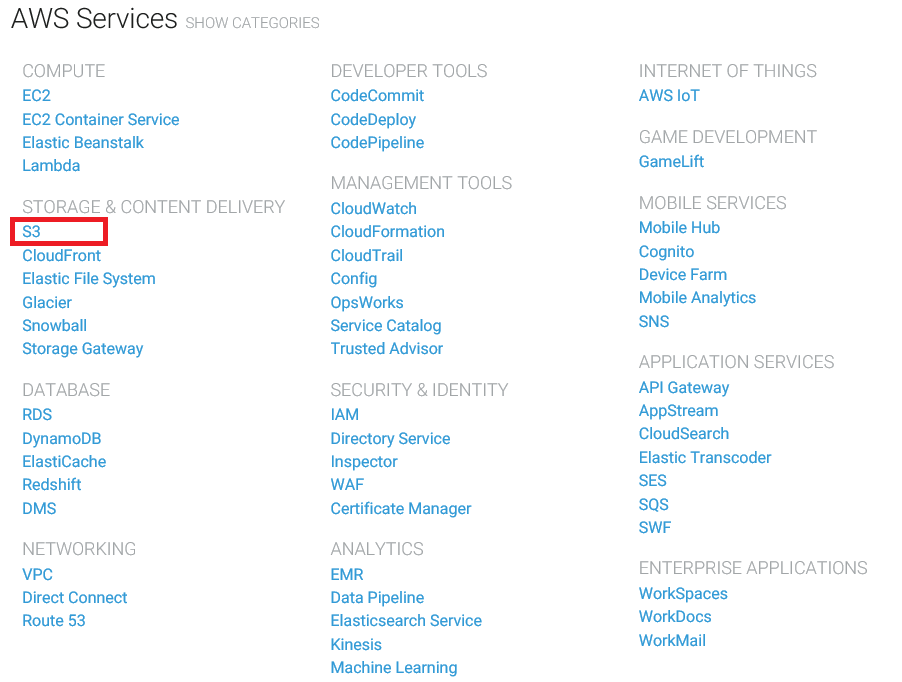
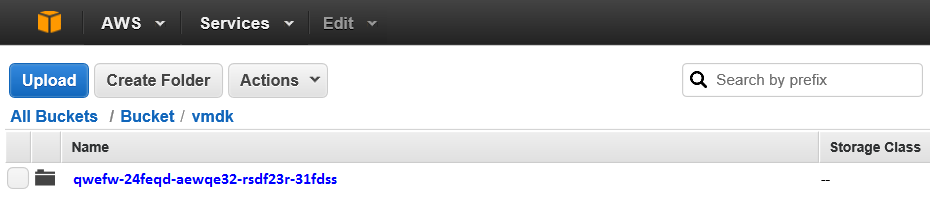
In Amazon AWS portal, click S3 storage
As you can see, new replication content of WindowsVM01 is created under the bucket specified in Amazon AWS.
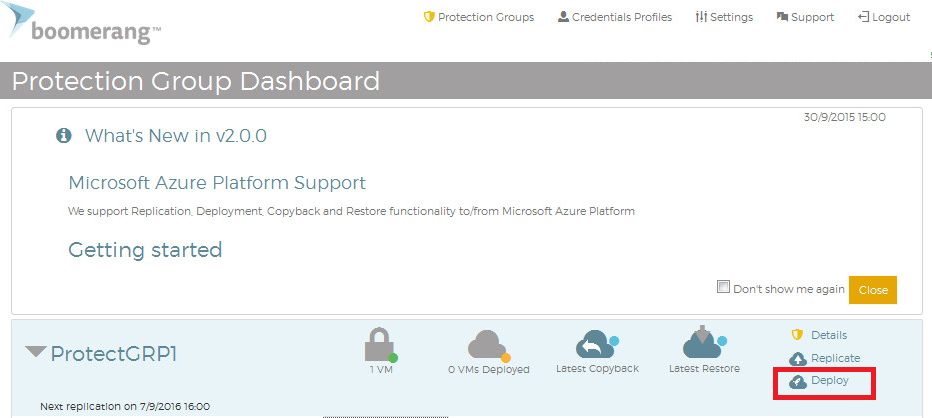
Once replication is finished, replication turns green as below with a successful / succeeded message.

Next step is to deploy the Virtual Machine (WindowsVM01) from the replication in the AWS bucket into a AWS AMI and use cloud formation to present to EC2 and migrate cloud.
Click deploy to migrate to cloud
Choose an existing Amazon AWS VPC
Choose Amazon AWS Instance Type
Click Amazon AWS Elastic IP (This assigns a Public IP to the EC2 instance)
Choose Amazon AWS Security Group
Choose Amazon AWS Subnet
Choose Amazon AWS IP Address or leave blank to use DHCP
Choose Amazon AWS Stack name
Click Deploy Now

View progress of VMware Deployed Virtual Machine into Amazon AWS migrating to the cloud as below


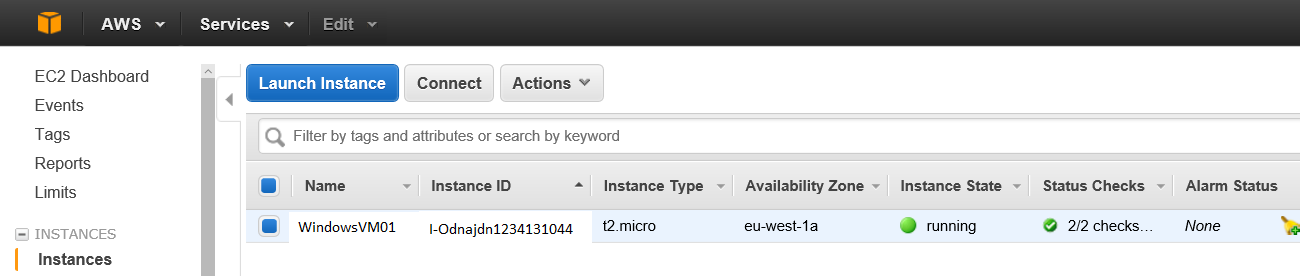
In Amazon AWS portal, we can see the image as an AMI
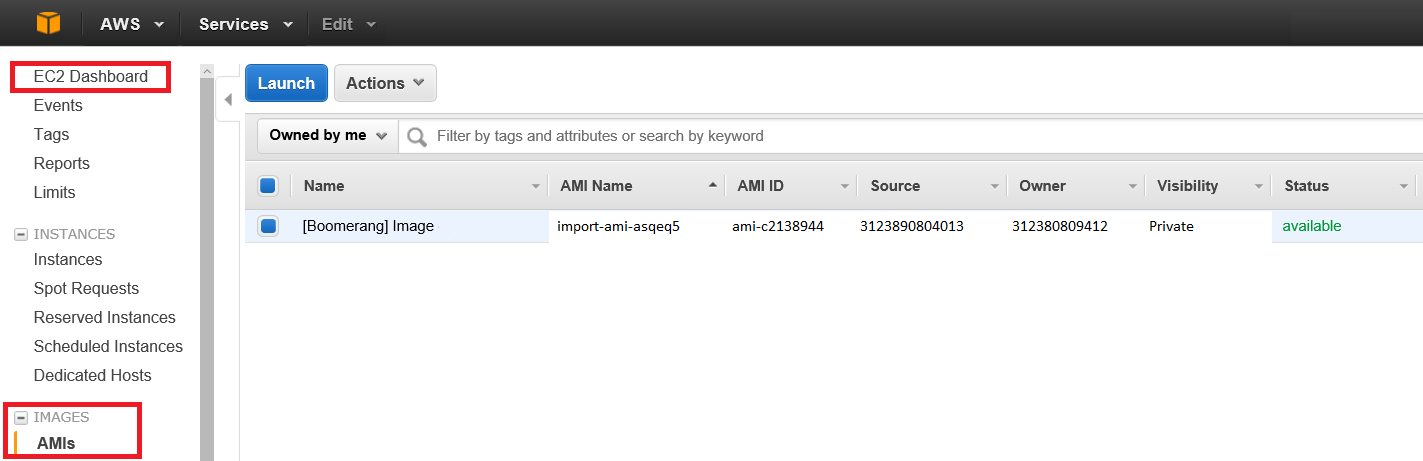
Confirm time taken to deploy VMware VM into Amazon AWS and the VM running in AWS
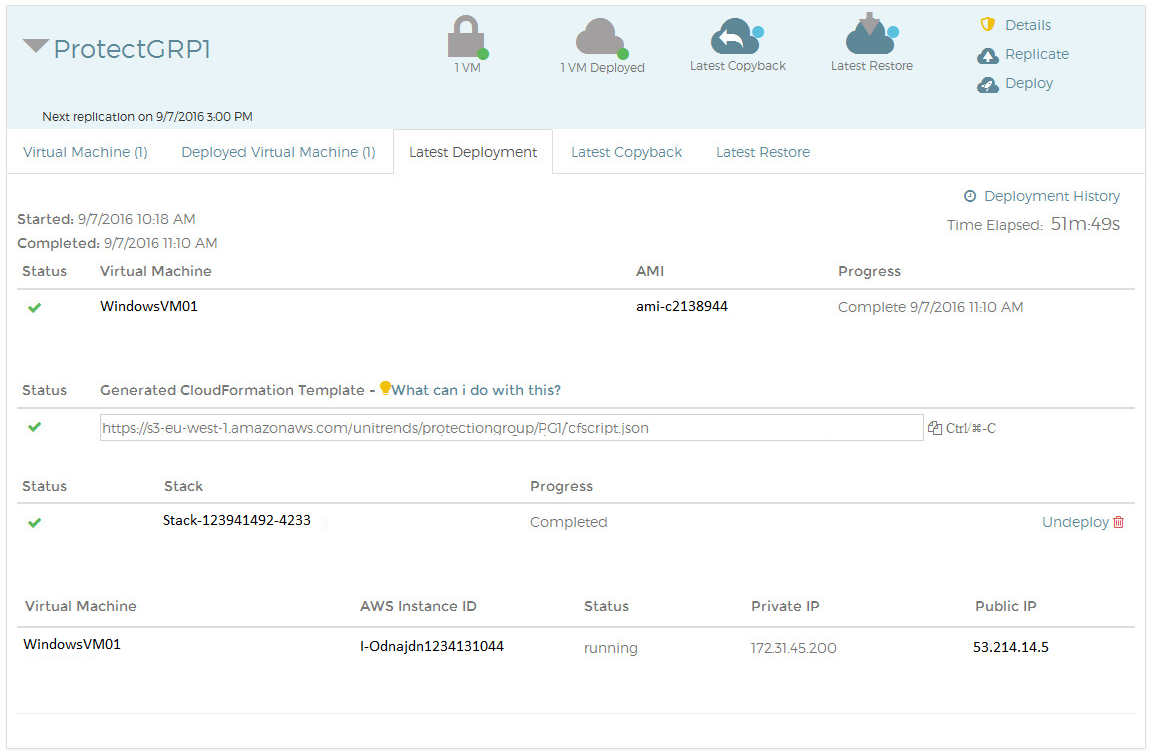
Cloud formation stack name completed

Confirm VMware virtual machine has been created from a replicated bucket, into a AMI image and using cloud formation is now converted and running in Amazon AWS. Migrate to cloud has been successful.
To RDP to the Windows VM, add a RDP TCP port 3389

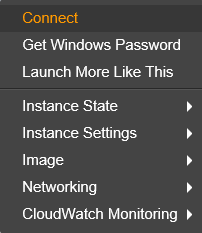
Right click VM in AWS and click connect
Run MSTSC from PC and enter the public ip address of the Amazon EC2 instance
Click connect and enter the credentials of the VMware Virtual Machine
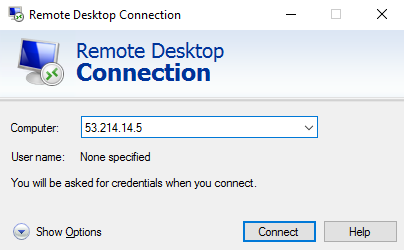
Confirm connectivity to the VMware Virtual Machine now running in Amazon AWS and migrated to the cloud.
Way cool! Some very valid points! I appreciate you writing this post and the rest of
the site is also very good.
This is truly helpful, thanks.